MG2 - Installation
Installation in rigid wall and floor
The product was tested and approved in:
- see the classification overview in the Declaration of Performance.
- Mounting is authorised in supporting constructions with a density equal or superior to the supporting construction used during the test, as described in EN 1366-3.
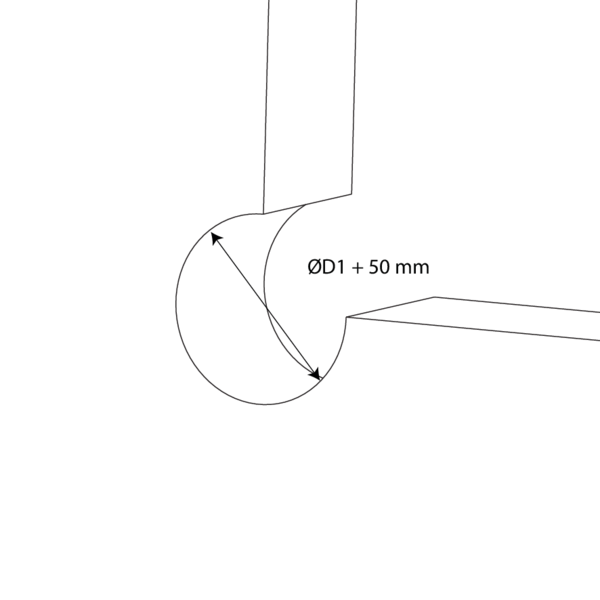
Provide an installation opening of ØD1 + 50 mm.
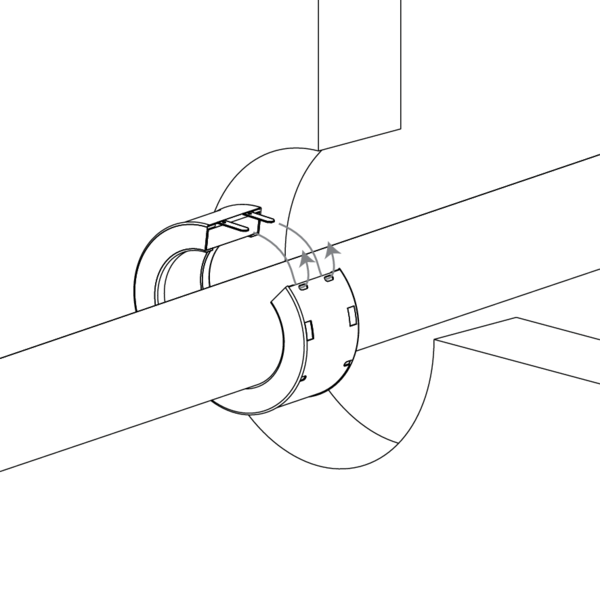
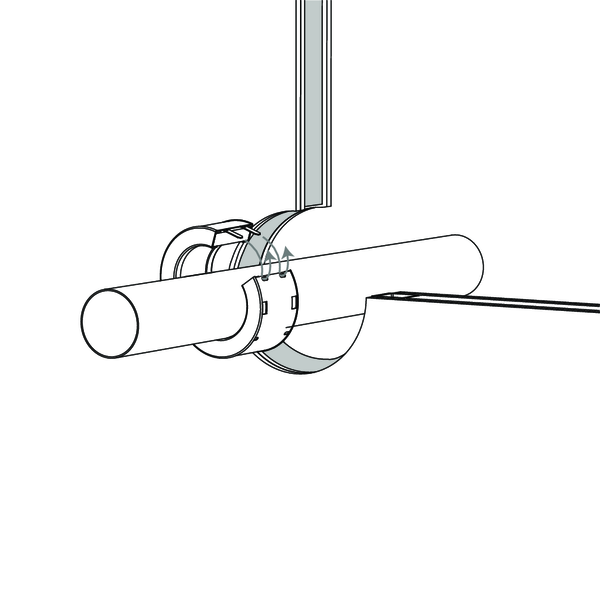
Remove the label. Open the fire collar and place it around the pipe.
Slide the fastening strips through the corresponding holes.
Fold back the strips.
Slide the fastening strips through the corresponding holes.
Fold back the strips.

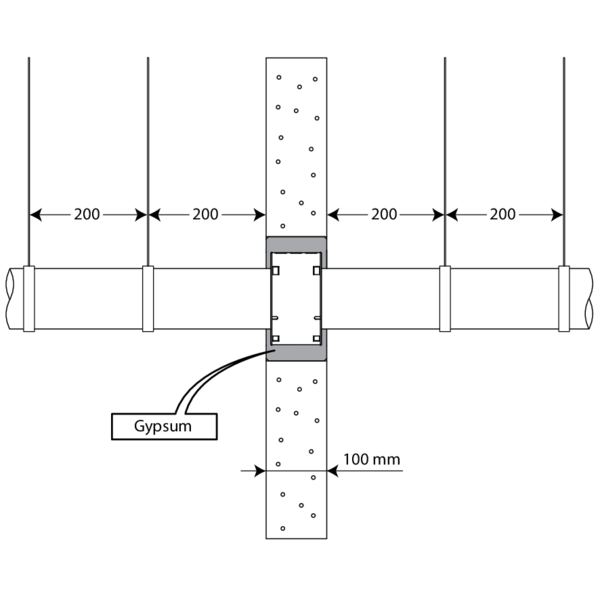
Slide the collar into the opening of the wall, in the middle of the wall thickness.
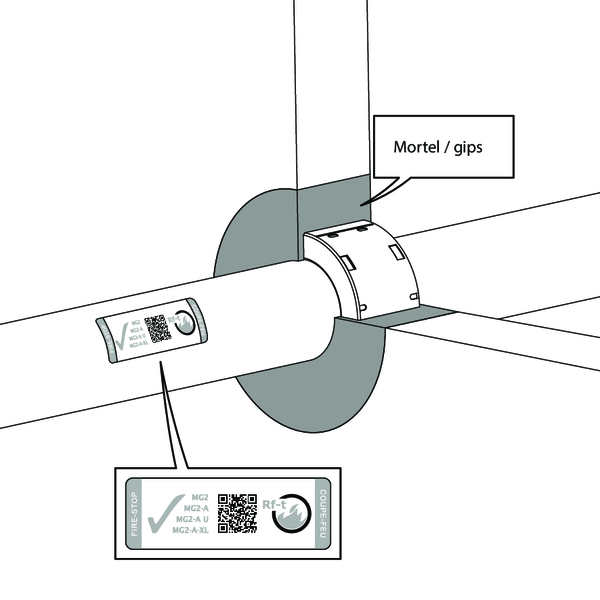
Seal with standard mortar (floor) or plaster (vertical wall).
Apply the label nearby the collar.
Apply the label nearby the collar.
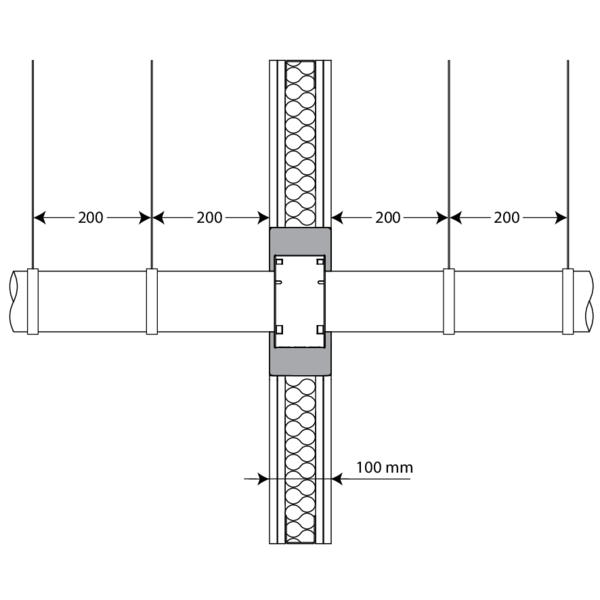
For zero distances: the collars can be placed against one another (< 100 mm). See declaration of performance for the correct classification.
Installation in flexible wall (metal stud gypsum plasterboard wall)
The product was tested and approved in:
- see the classification overview in the Declaration of Performance.
- Mounting is authorised in supporting constructions with a density equal or superior to the supporting construction used during the test, as described in EN 1366-3.
Fix two gypsum boards type F with a tickness of 12,5 mm to one side of the metal stud wall.
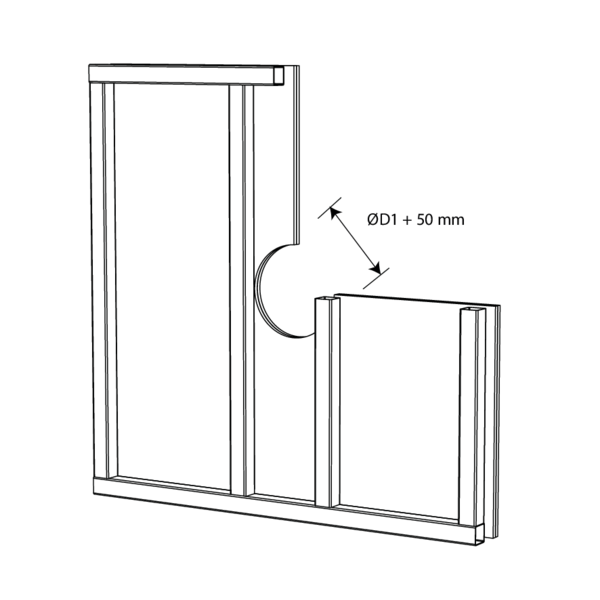
Provide a min. Installation opening in the wall of ØD1 + 50 mm.
Provide a min. Installation opening in the wall of ØD1 + 50 mm.
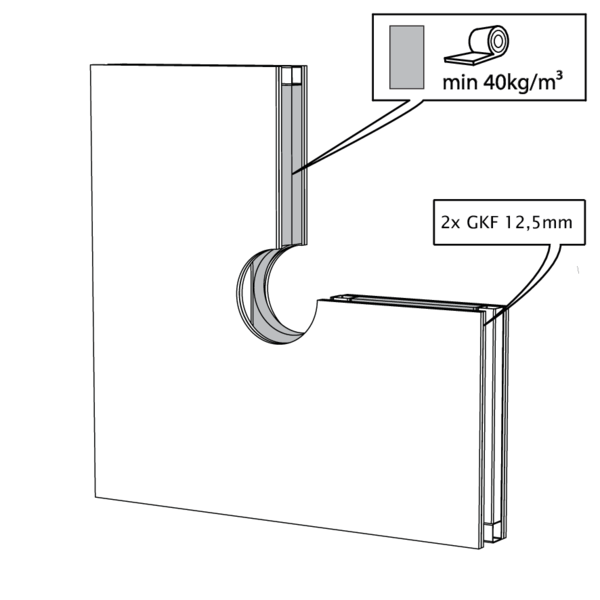
Insulate the wall and finish with two gypsum plasterboards type F.
Place the plastic pipe.
Remove the label. Open the fire collar and place it around the pipe.
Slide the fastening strips through the corresponding holes.
Fold back the strips.
Remove the label. Open the fire collar and place it around the pipe.
Slide the fastening strips through the corresponding holes.
Fold back the strips.
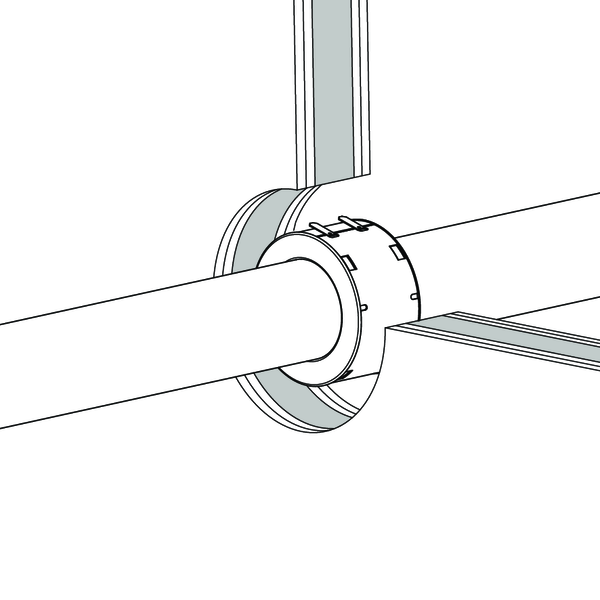
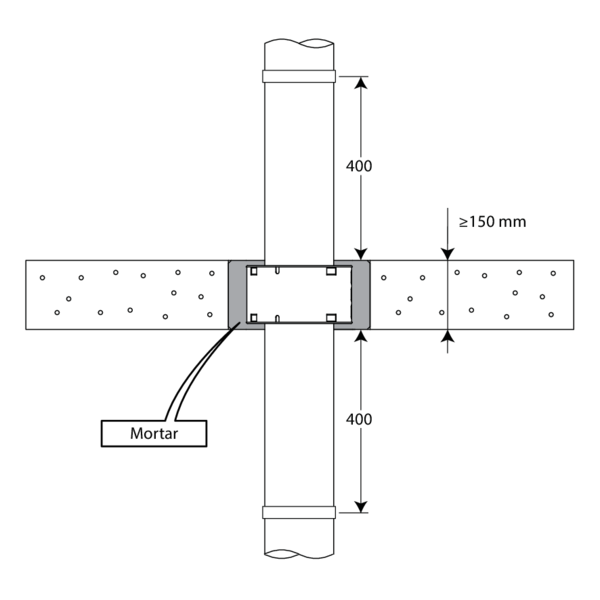
Slide the collar into the opening of the wall, in the middle of the wall thickness.
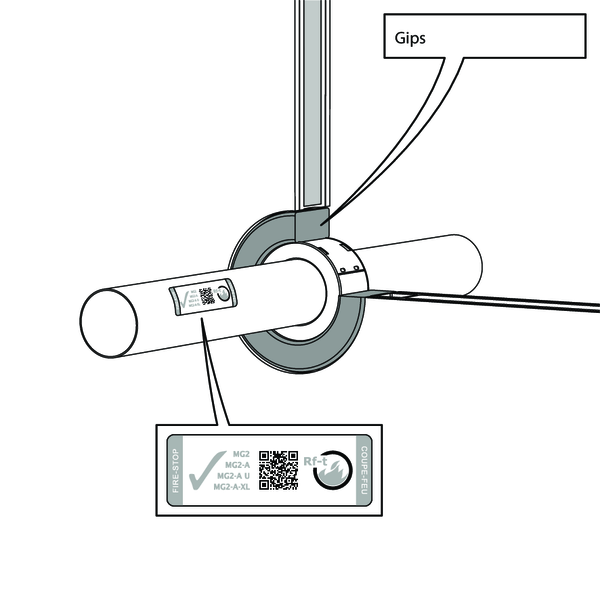
Seal with gypsum.
Apply the label nearby the collar.
Apply the label nearby the collar.
Installation in flexible and rigid wall, sealing with rigid rock wool boards with coating
The product was tested and approved in:
- see the classification overview in the Declaration of Performance.
- Mounting is authorised in supporting constructions with a density equal or superior to the supporting construction used during the test, as described in EN 1366-3.
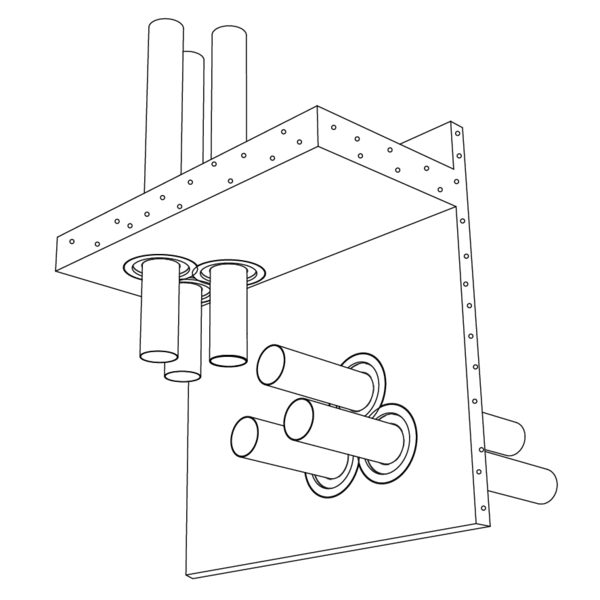
Provide an installation opening of maximally 1000 x 600 mm.
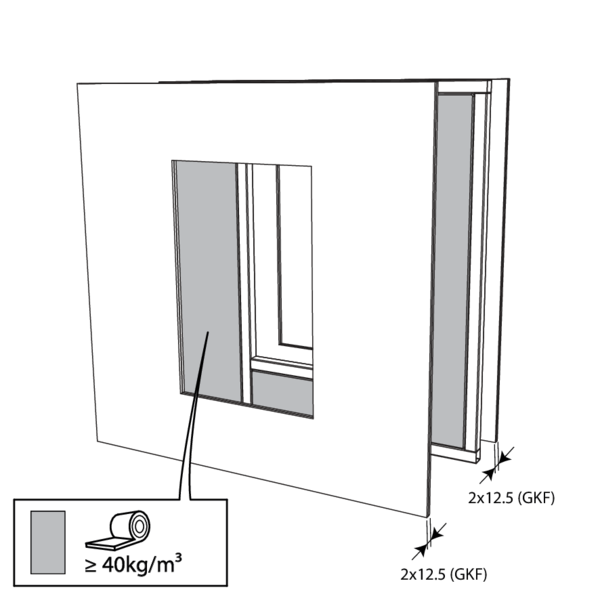
Fix two gypsum plasterboards type F of 12,5 mm thickness to each side of the metal studs and insulate the wall with 40 mm mineral wool, 40 kg/m³.
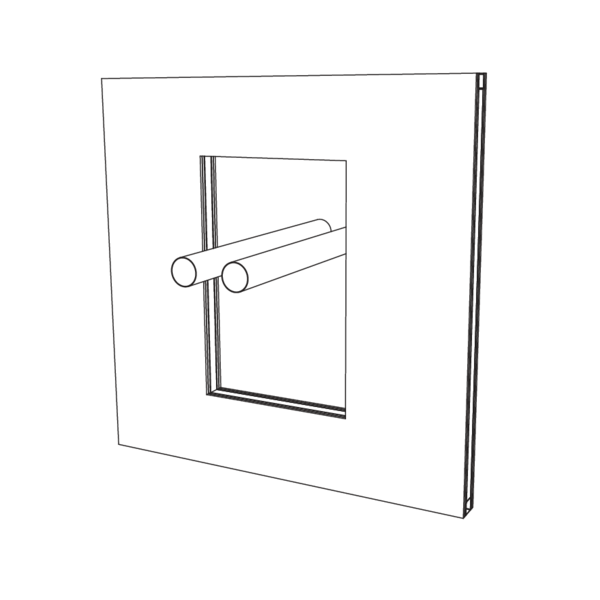
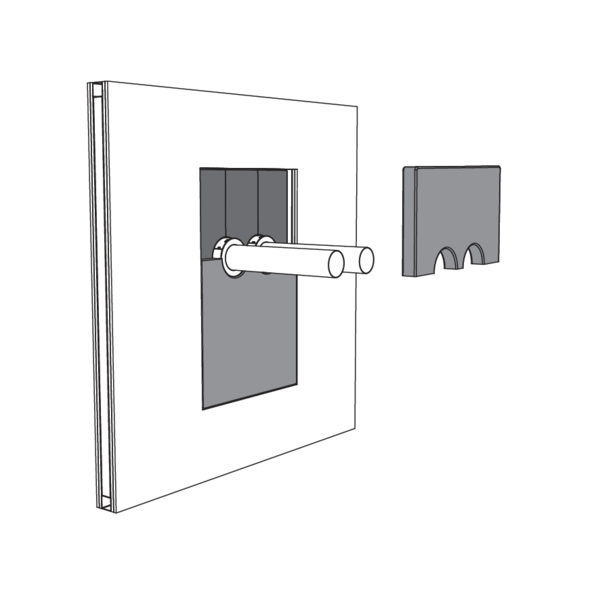
Place the plastic pipe(s). The distances between the pipes and the edges of the seal are min. 100 mm.
Place the built-in fire collars around the pipes by removing the label and fixing the collar by bending the fastening strips. Position the collars in the middle of the wall thickness.
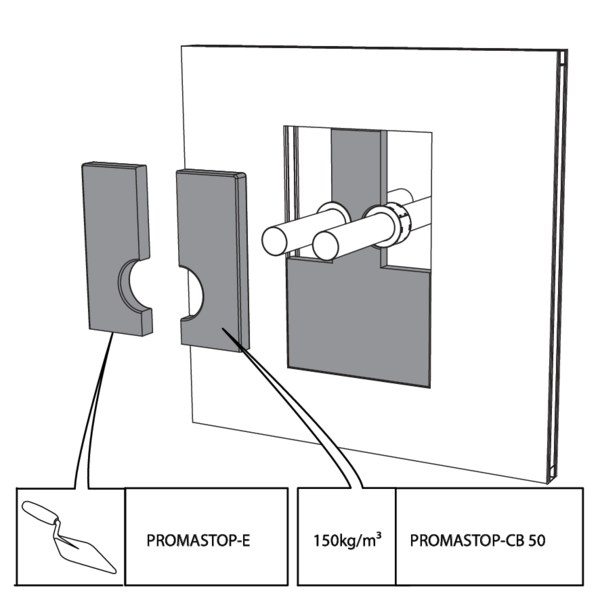
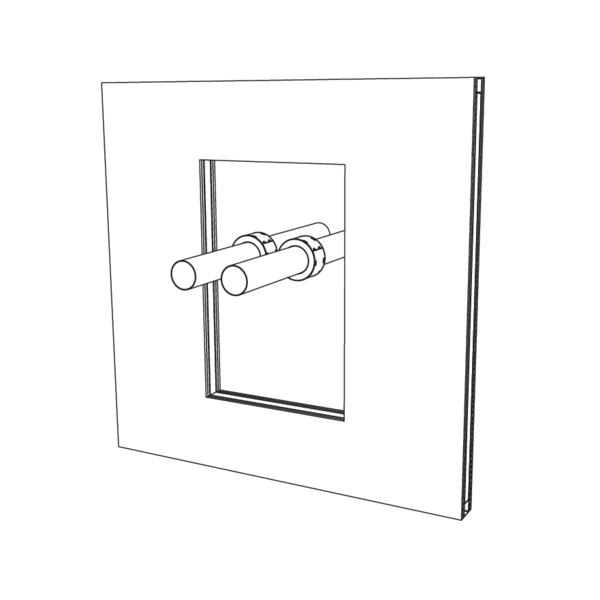
Fix a stone wool board of min. 50 mm thickness with fire resistant coating on one side (type PROMASTOP-CB 50) around the fire collars. Use a saw or knife to dimension the stone wool boards. Apply endothermic coating (type PROMASTOP-E) on the lateral sides, as well as on the joints.
Put the second stone wool board of min. 50 mm thickness around the collars. Avoid the joints from coinciding. Apply endothermic coating (type PROMASTOP-E) on the lateral sides, as well as on the joints.
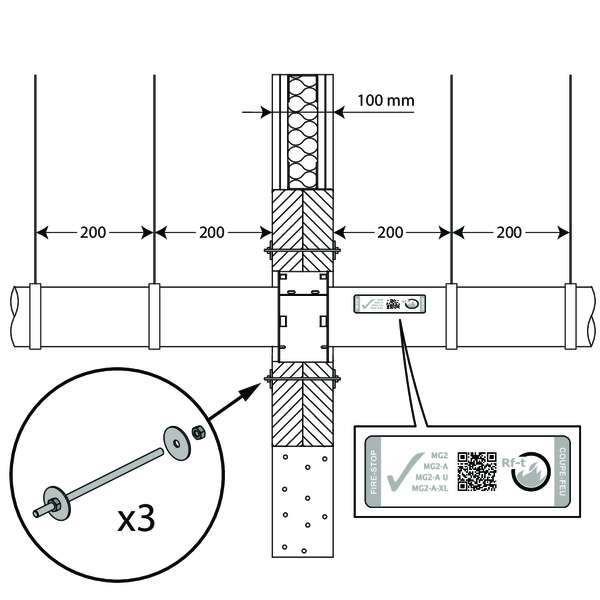
Put 3 threaded rods through the stone wool boards and fix with M6, washers and bolts.
Apply the label nearby the collar.
Apply the label nearby the collar.
General remarks
- The installation must comply with the installation manual and the classification report.
- The pipe must be supported in order to guarantee the well-functioning of the sealing during a fire. Supports and fastenings should be realised according to the rules of good craftsmanship.